Overview and Objective
In this unit, students will explore some 3D projection techniques. They will learn about the classification of 3D projections while exploring the secrets of some famous optical illusions.
Activity #1 - Drawing a Cube and Introduction to 3D Projection
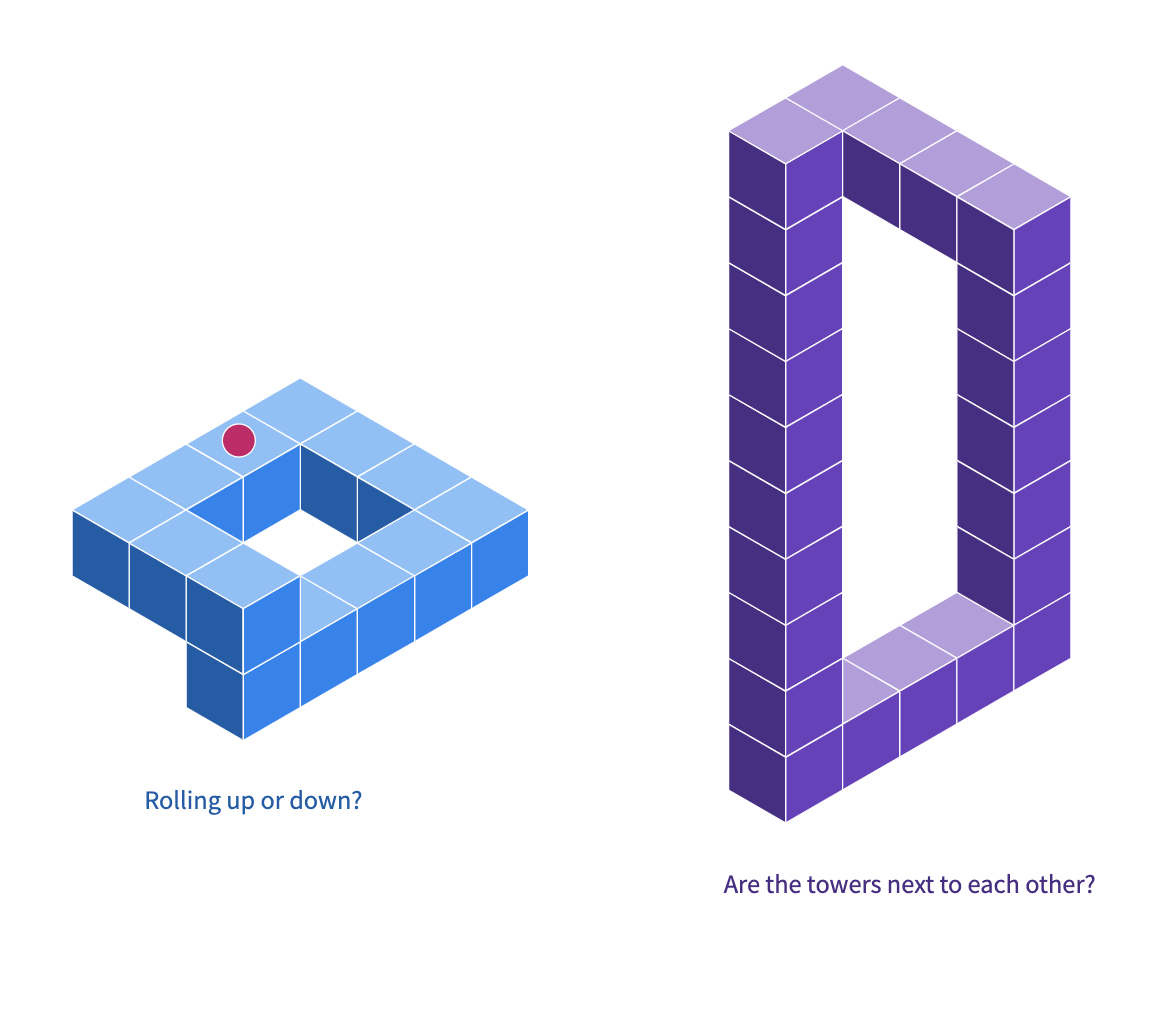
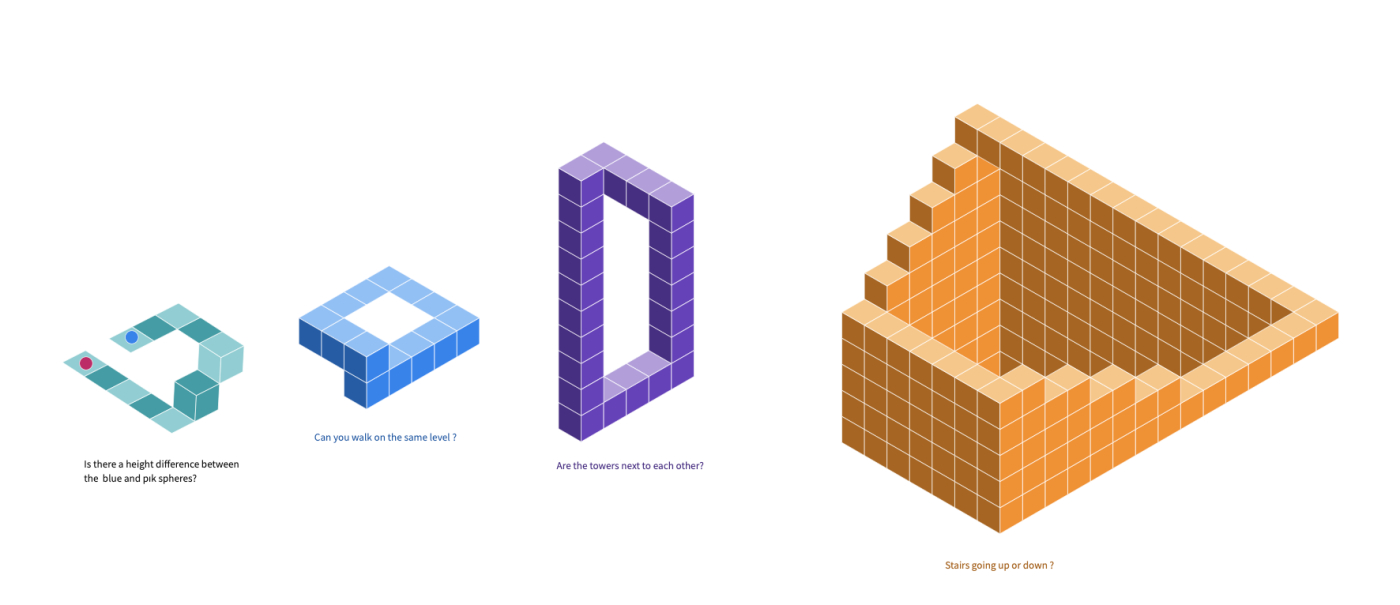
Start with displaying one or more examples from the Optical Illusions Polypad. Ask students what they notice and wonder about the shapes.
After the discussions, clarify with the students that those images are examples of optical illusions. Optical illusions are images that deceive the eye by appearing to be other than it is.
Drawing three-dimensional objects on two-dimensional surfaces - which is called 3D Projection - means visually creating and adding another dimension to the existing two dimensions of the surface. So, whenever we draw a 3D object on a 2D surface, we create an optical illusion!
One of the easiest 3D objects to project on a 2D surface is a cube. We have all been drawings cubes since our childhood. One might say that everyone has a way of drawing o cube.
Open a blank Polypad and invite students to draw a unit cube. Compare the different cube models and strategies they use.
Here are some possible drawings;
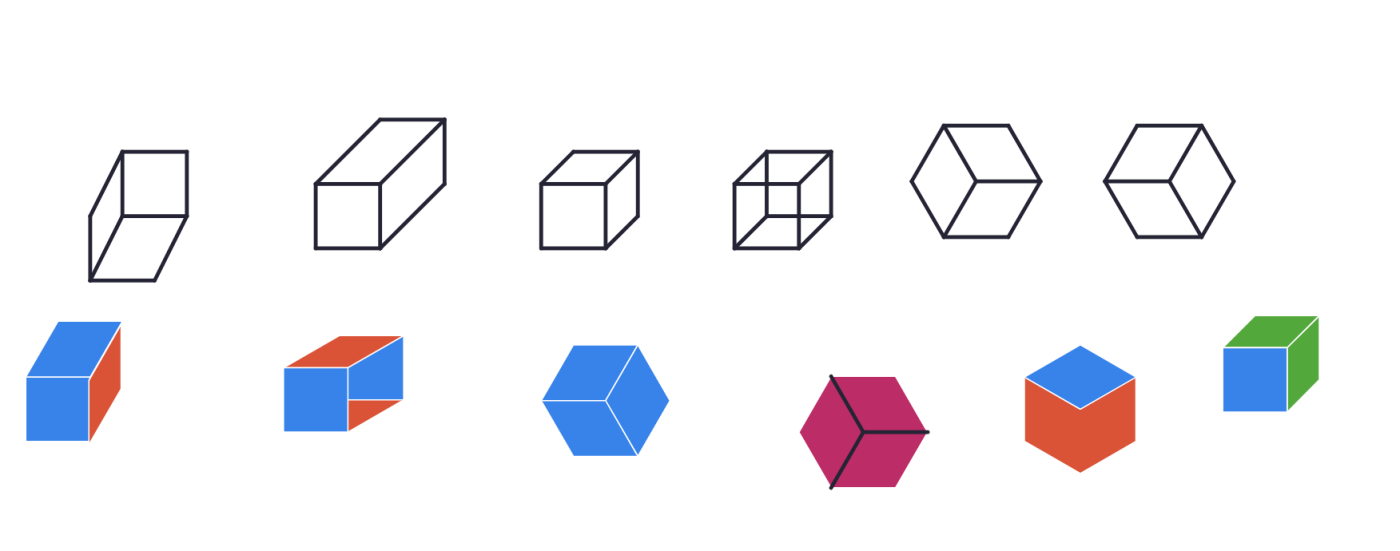
They might have used the grid backgrounds or the polygon tools to create their models. You may also discuss the dimensions of the cubes students draw. Are all the dimensions of the cubes 1 unit? You may insert a cube from the 3D Solids toolbar and slowly rotate it to create various views. In fact, even a square can represent a cube as a plan view.
We can draw the side views of a 3D object - the left, top, and front views, for example. This is called an orthographic projection. You can think of it as taking multiple photos of an object from different angles.
Check the related activities here.
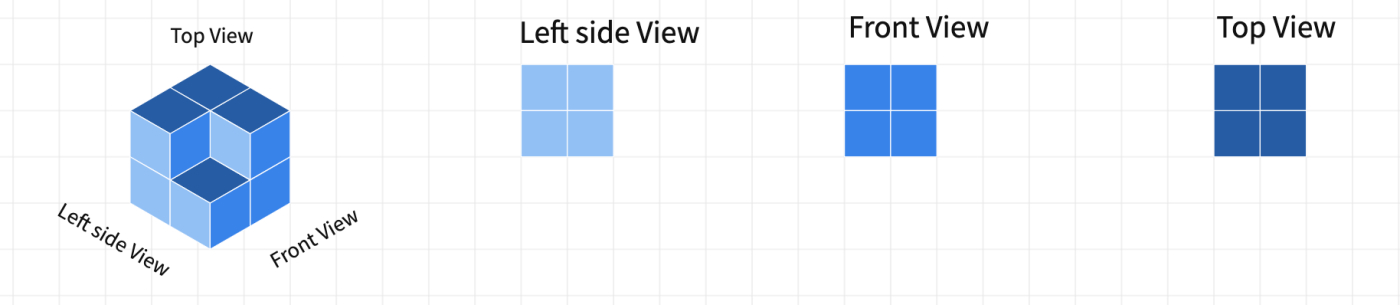
Orthographic projection allows more detailed, accurate drawings and measurements since doing so project the 2D faces of an object onto the 2D surface. Designers and engineers usually add another 3D projection of the object to the drawing, since this multi-view projection might fail to reflect the complete model to the viewer.
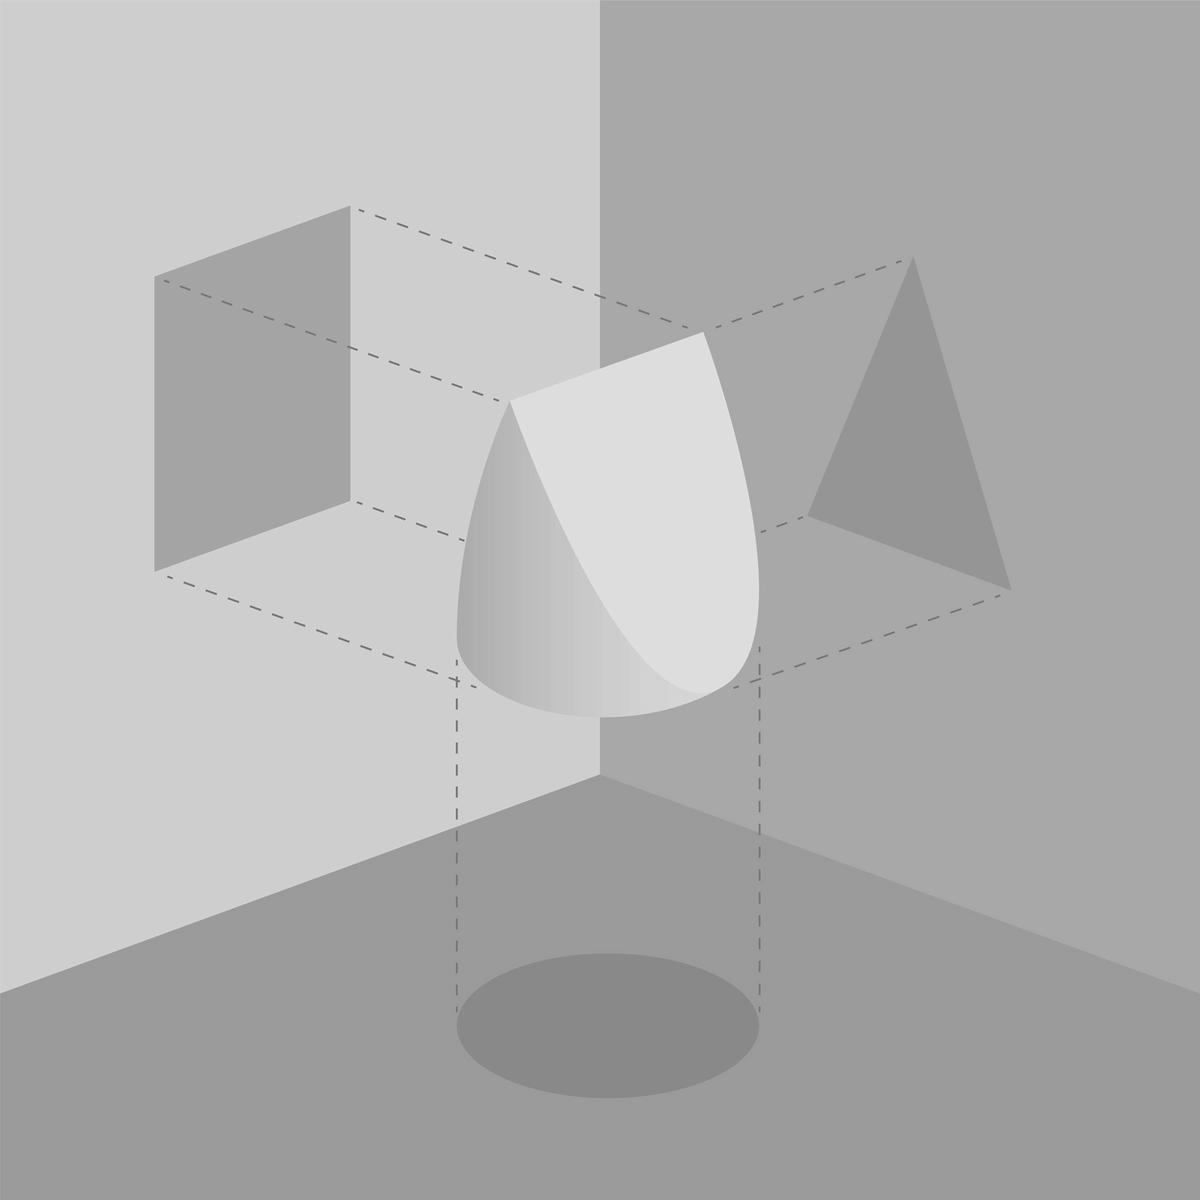
For example, here is the orthographic projection of the famous round square triangle object. Ask students if they can visualize this object only by looking at the side views?
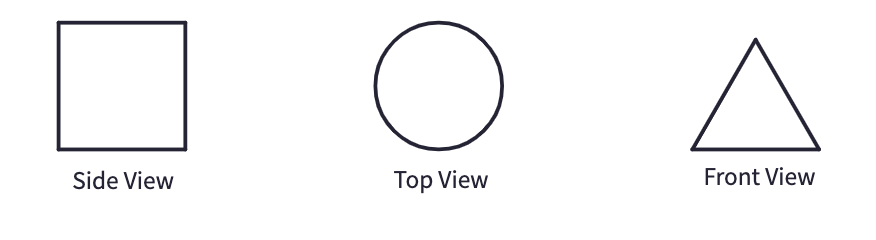
You can end the first activity by discussing the advantages and limitations of the orthographic projection with students by showing the actual object here.
Activity #2 - Parallel Projections
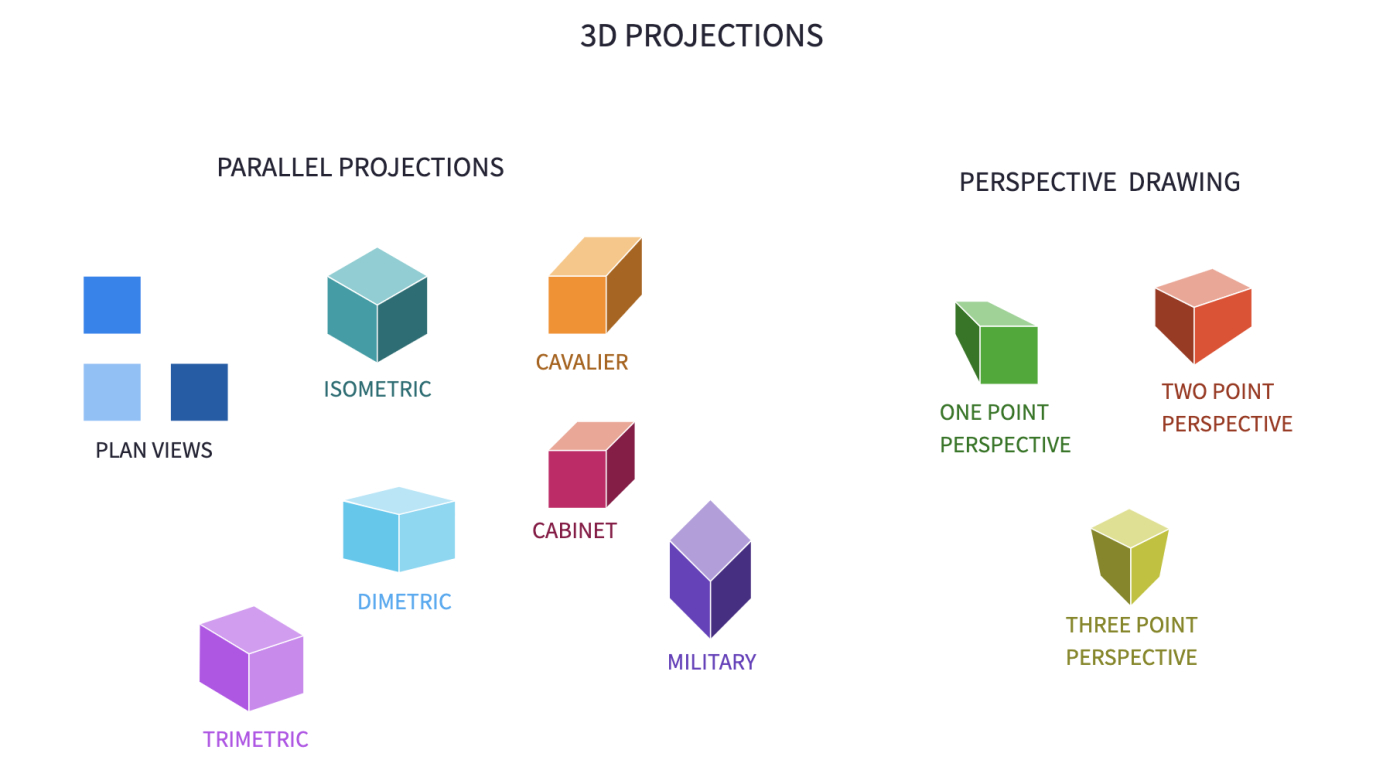
From interior designers and artists to architects and computer graphics designers, many professions use 3D projections for different needs. There are various other projection methods that are usually categorized as parallel and perspective projections.
You may display the classification of some of the projections using this Polypad.
In parallel projection, lines that are parallel in the original 3D object remain parallel in the 2D projected image. This method is based on the actual measurements of the object. This means that the image formed on the projection plane has the same scaled dimensions as that of the original object. One of the most well-known parallel projection techniques is isometric projection. In fact, the isometric view was the standard view until the mid-20th century.
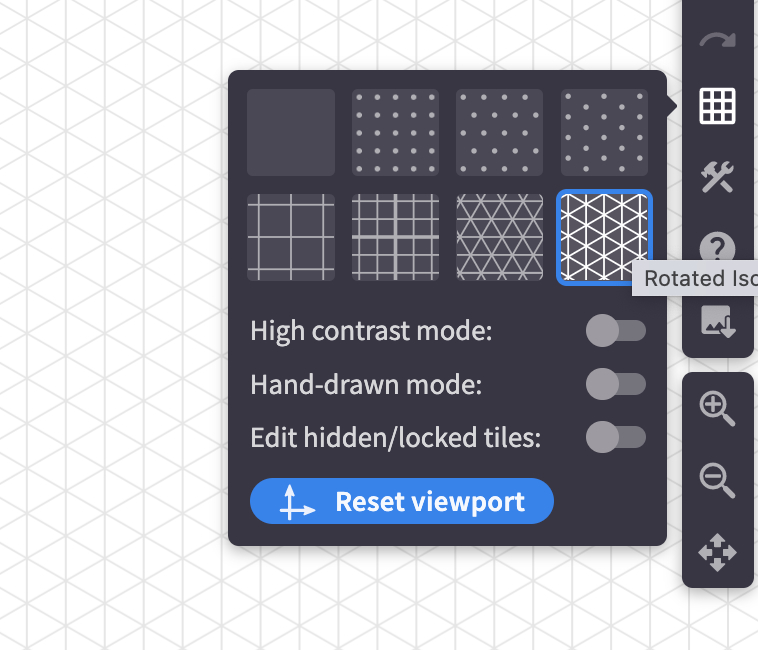
In the grid options on Polypad, select the rotated isometric grid to draw and show the measurements of the isometric projections.
Draw the isometric projection of a cube and ask about the properties of this projection. Clarify with the students that
- The square faces of the cube are transferred on the grid as rhombuses. It is usually said that the square faces of the cube are distorted as rhombuses.
- The perpendicular edges became the isometric lines.
- Like in the 3D object, the opposite edges of the cube are parallel in the 2D projected image.
Draw the , , and axes on the projection, and ask about the angles between any two axes. Since all three angles are the same, this projection is called isometric projection. But what about the other types?
If only two of the axes of the drawing are equally inclined to the projection plane, then you draw a dimetric projection. You may determine the angles of the axes according to the purpose of your drawing.
After showing the technique, you may ask students to work in pairs, and let each group try another angle to compare how the projections will change according to the angles of the axes. For instance, if you increase the angle between the edges of the cubes and the baseline, you can see more of the top base.
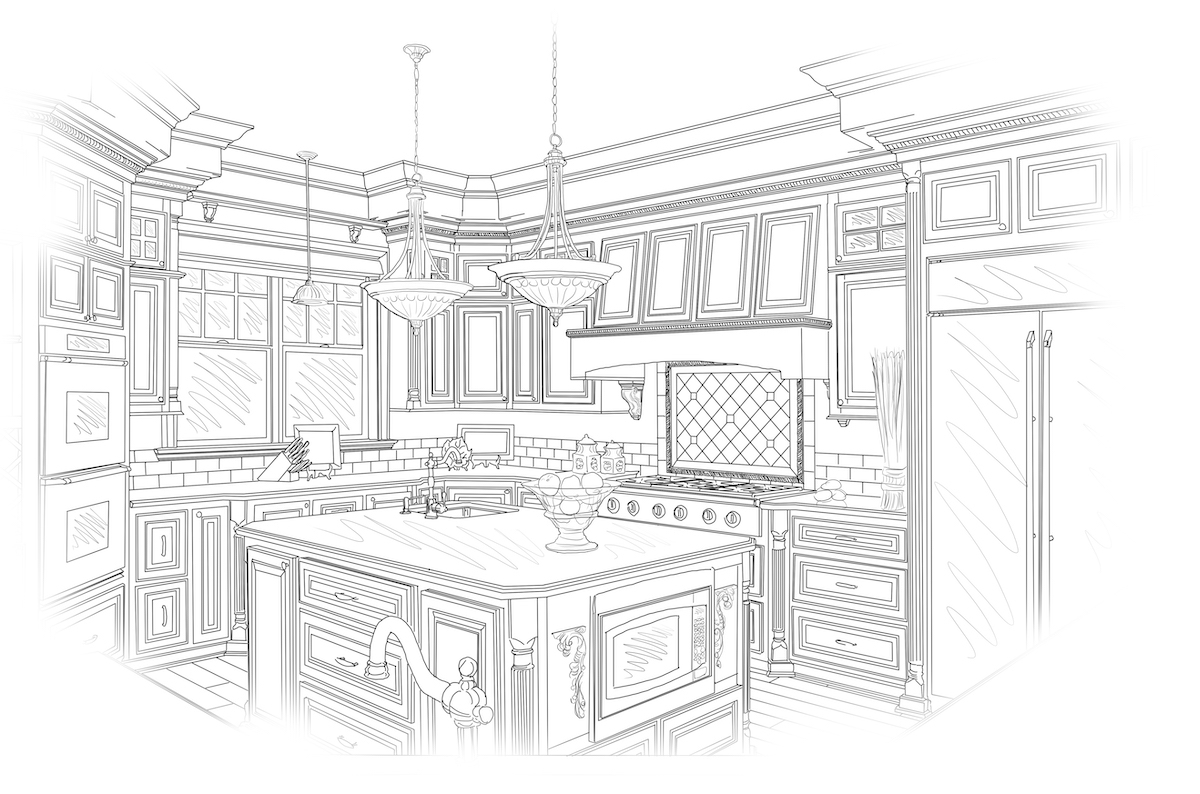
Ask students to think about what type of drawings may require more the top face to be shown. Kitchens are a good example of something that are usually drawn in diametric projections.
If students are familiar with the trigonometric ratios, they may also calculate the side lengths of the drawing to find out which angle creates a drawing closest to the actual cube’s dimensions.
You may ask students to predict the angles in the trimetric projection. Clarify with them that this time the angles between the axes and the projection plane are all different.
Display the Penrose Triangle (Impossible triangle) using this Polypad. Ask students the measure of each interior angle of the triangle. You may talk about why it is called the impossible triangle and how isometric drawing helps us to create this illusion.
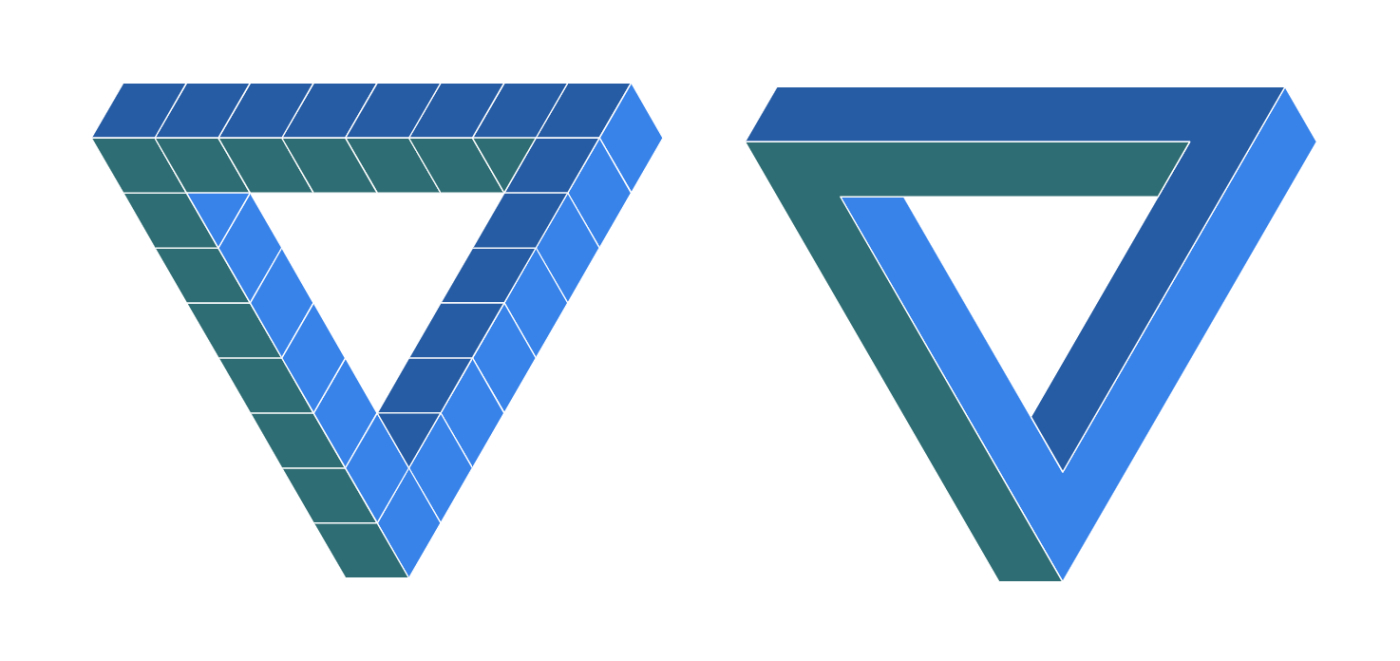
The limitations of the parallel projections allow artists, scientists, and designers to create optical illusions like Penrose Triangle and Escher’s stairs.
In isometric, dimetric, and trimetric projections, side lengths are preserved but angles are not! This allows the objects at the back of the drawing to be scaled the same as the objects in the front. Most of the illustrators use this fact to create optical illusions.
You may also display Waterfall and Ascending and Descending to show how M. C. Escher used parallel projection to create one of his most famous artworks.
Activity #3 - Oblique Projections
Consider asking students to research Cavalier, Cabinet, and General projections and complete their drawings as an extension. These three projections are specifically called oblique projections.
These parallel projections are based on displaying one face of the object as a one-to-one or scaled copy and distorting the other faces with different angles. Designers can pick different angle measures to emphasize a particular face.
In Cavalier projection, the angle between the side face and projection plane is and the depth of the object is shown in full scale like the other two dimensions. Even if we use exactly the same side lengths, distortion seems greater than the other projections.
In Cabinet projection, the angle between the side face and projection plane is and the depth of the object is projected at scale.
Although the third dimension scaled in half in the cabinet projection. It provides a more realistic depth for the viewer. Have students work with a partner to try different angles and scales for the general projection. After comparing different angles and scales, you can end the lesson with a class discussion on the pros and cons of the oblique projections.
Activity #4 - Perspective Drawing
Use this Polypad to show another illusion to students. Ask which one of these objects is bigger? After some discussion, drag one of the objects onto the others to reveal the illusion.
In the previous activities, students explored that objects drawn with parallel projection do not appear larger or smaller as they extend closer to or away from the viewer.
To create the depth effect on the canvas, artists usually use perspective drawings as a projection technique. This time, lines that are parallel in nature appear to intersect in the projected image. When you look at the railways, they appear to converge towards a single point, called the vanishing point.

Consider introducing Filippo Brunelleschi's experiment regarding linear perspective in the 15th century. Once the basic shape of the object is defined (for a cube, it is a square), lines that connect back to the vanishing point are added from each corner of the object. These diagonal lines are called orthogonal. The back "face" of the cube is added by drawing another square that touches all four orthogonals as they intersect back in space.
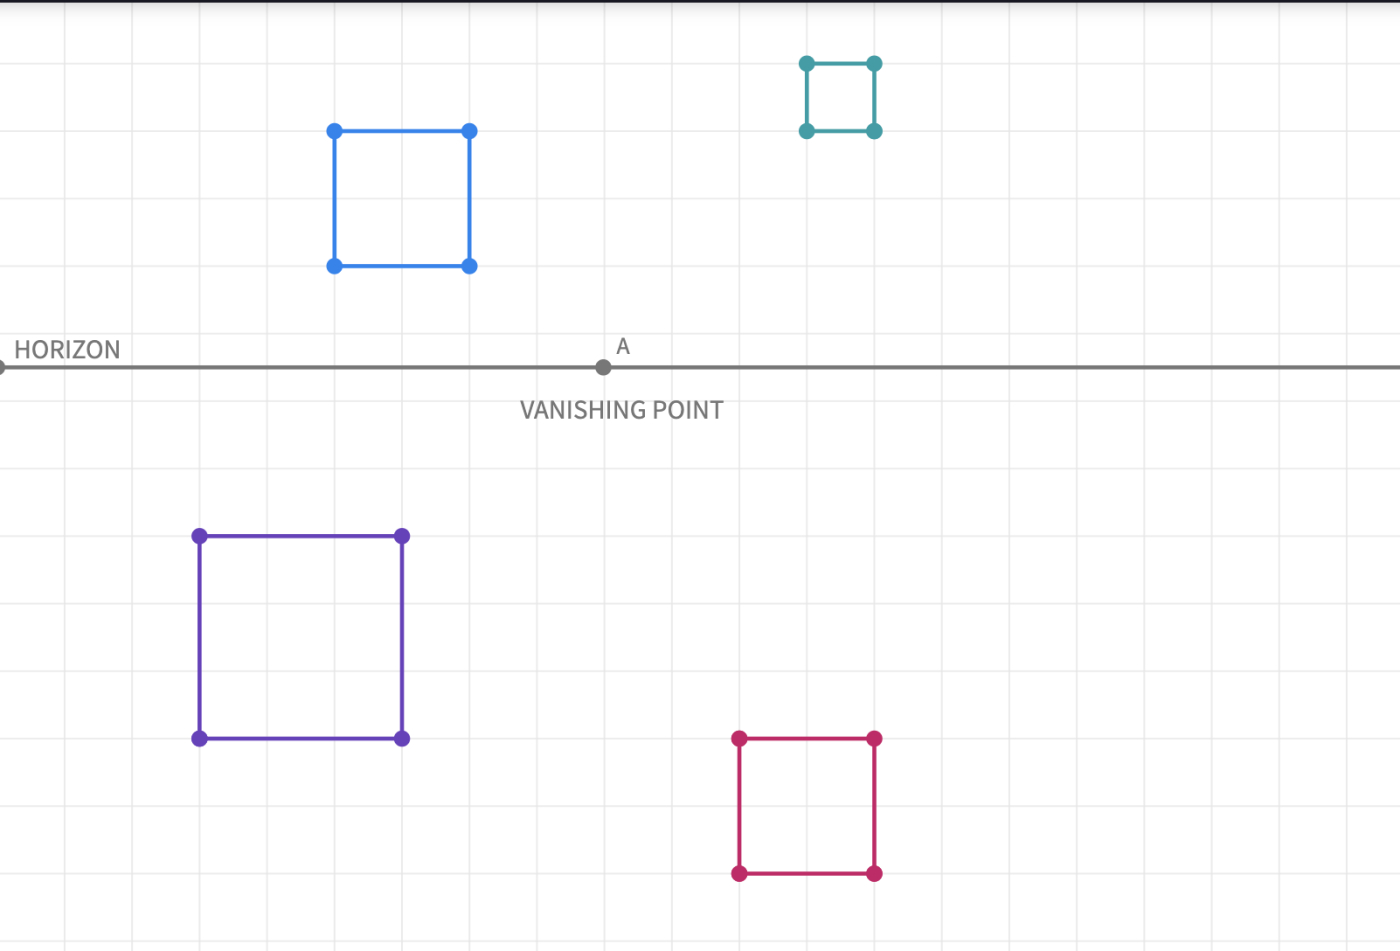
- Start with drawing the horizon (This line theoretically represents the line that divides the sky from the ground.) and creating a vanishing point, A, on the line.
- Draw any size of a square as a starting point (face) for creating the perspective drawing of your cube.
- Connect all four vertices with the vanishing point, A, by drawing lines. These lines are called orthogonal lines and will help form the other edges of the cube.
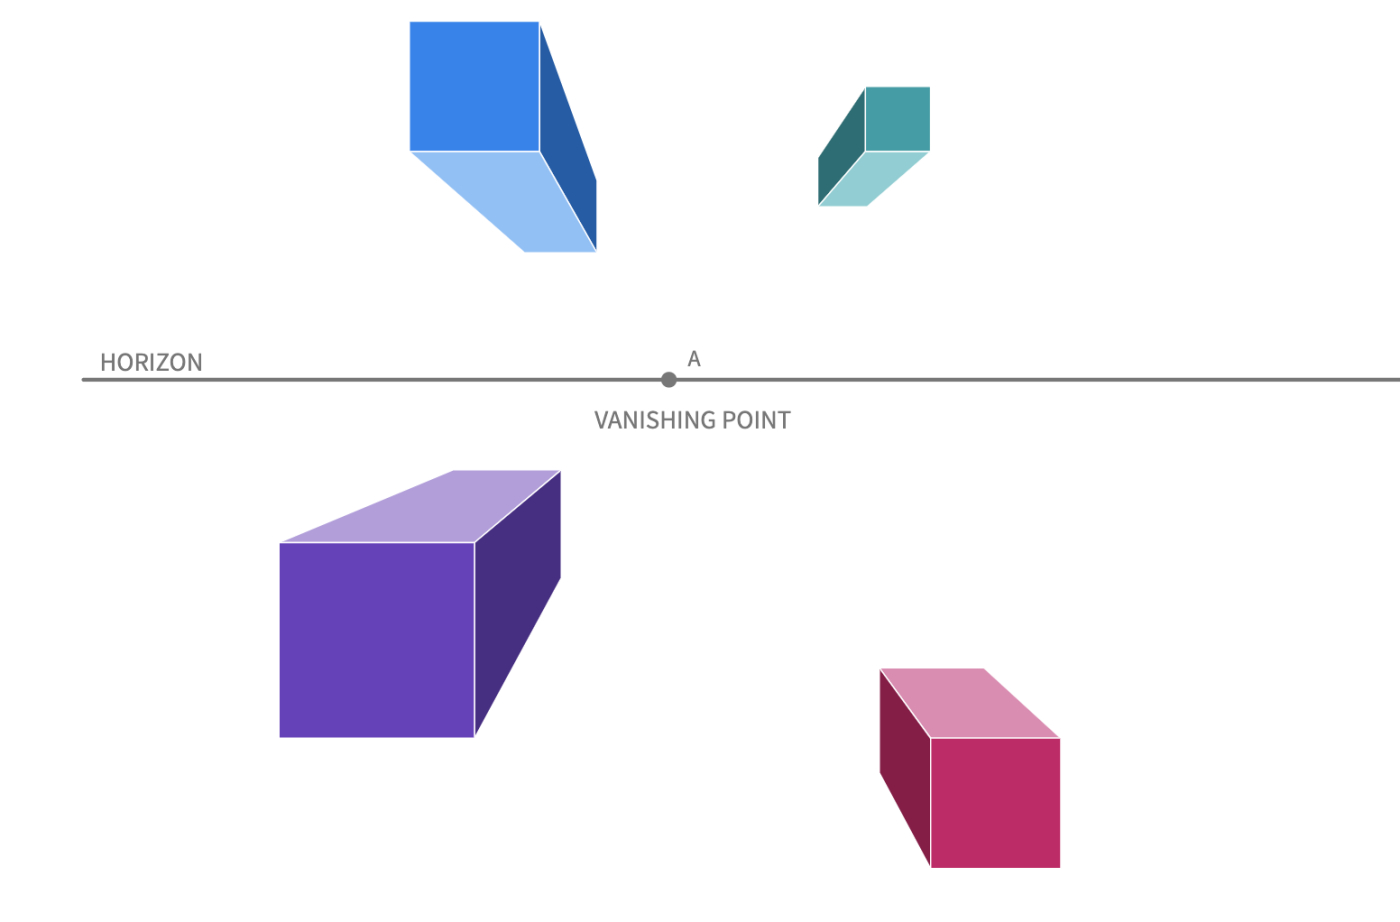
- Insert a point on one of the orthogonal lines to start drawing the parallel edges of the cube.
This process can be replicated to create additional cubes or other structures without changing the vanishing point.
You may also use this Polypad to demonstrate the effects of changing the location of the vanishing point on the projection.
You may re-display the illusion at the beginning of the lesson. It is based on the “Ponzo illusion” that plays with the mind’s tendency to judge an object’s size by the background. You may now ask students how the background is created to play with our depth perception. Once they remove the background, it becomes obvious that all the objects are the same size.
Activity #5 - Perspective Drawing - II
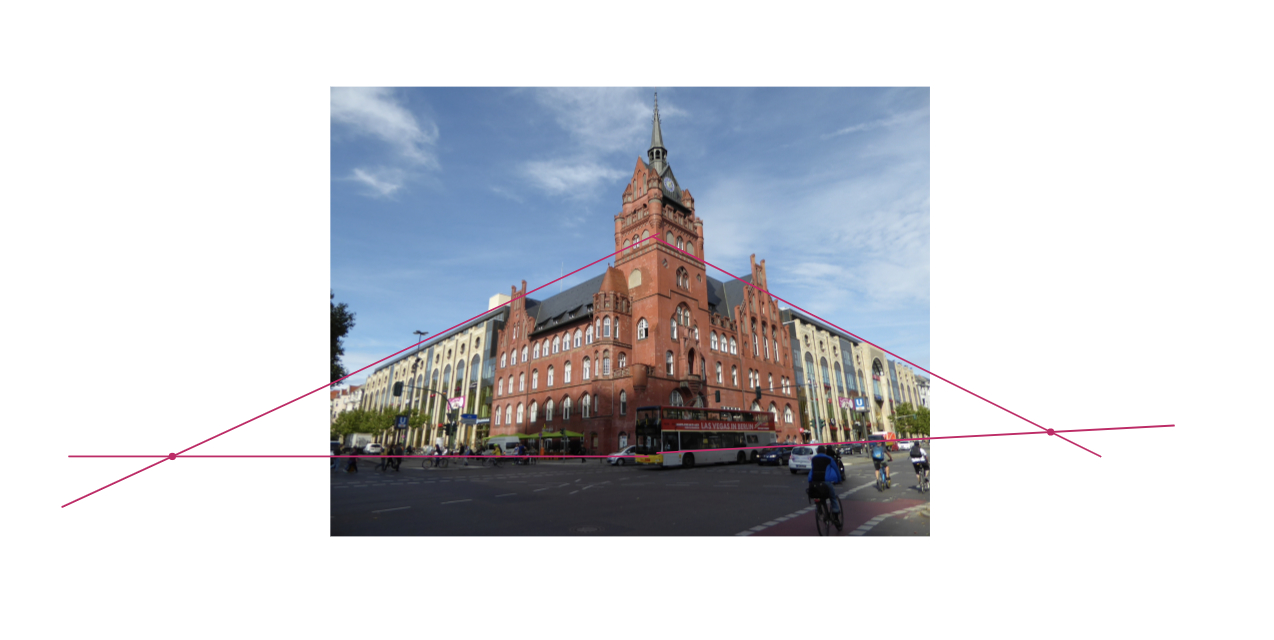
Display the photo of the historic Steglitz Town Hall in Berlin, Germany, and invite students to draw the orthogonal lines on that photo and locate the vanishing points using the ruler. They might quickly realize that there is more than one vanishing point in this photograph. Basically, when you stand at a corner of two streets like in this photograph, you see the structures are getting smaller when they get closer to the horizon at two different points.
Open a blank Polypad to start drawing a two-point perspective.
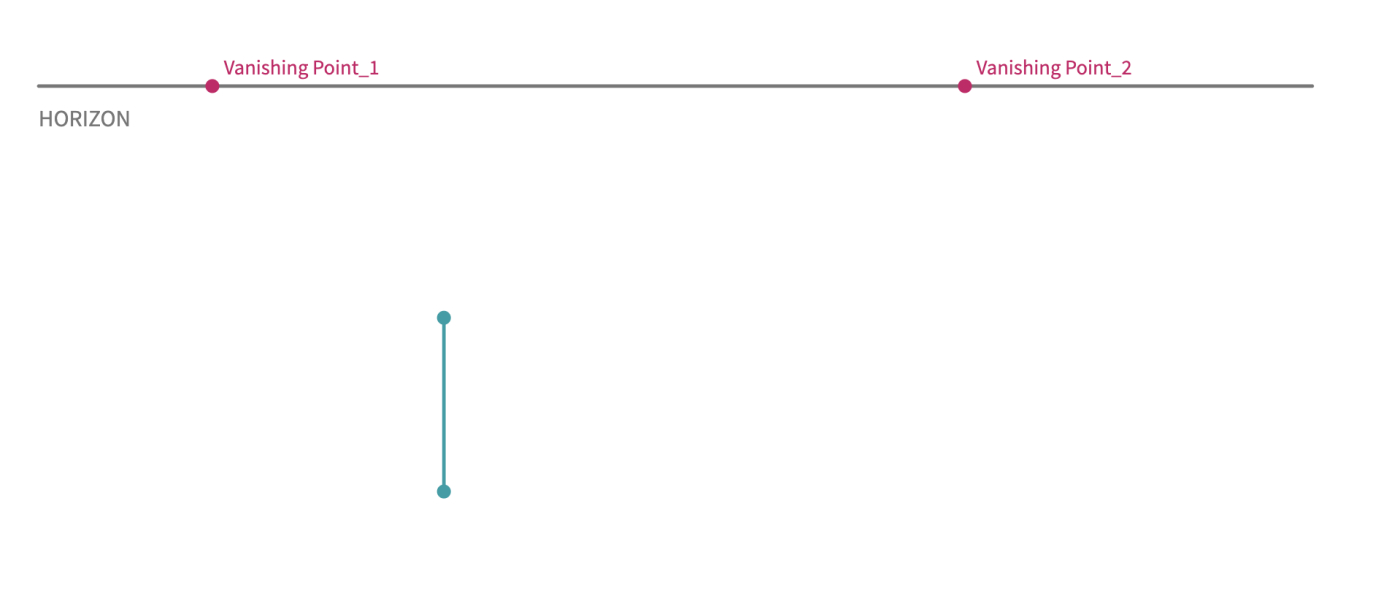
- Start by defining the horizon line.
- Place two vanishing points on the horizon line.
- This time, instead of drawing a square as the face of the cube, we need to draw only an edge.
- Connect two endpoints of the edge with each vanishing point.
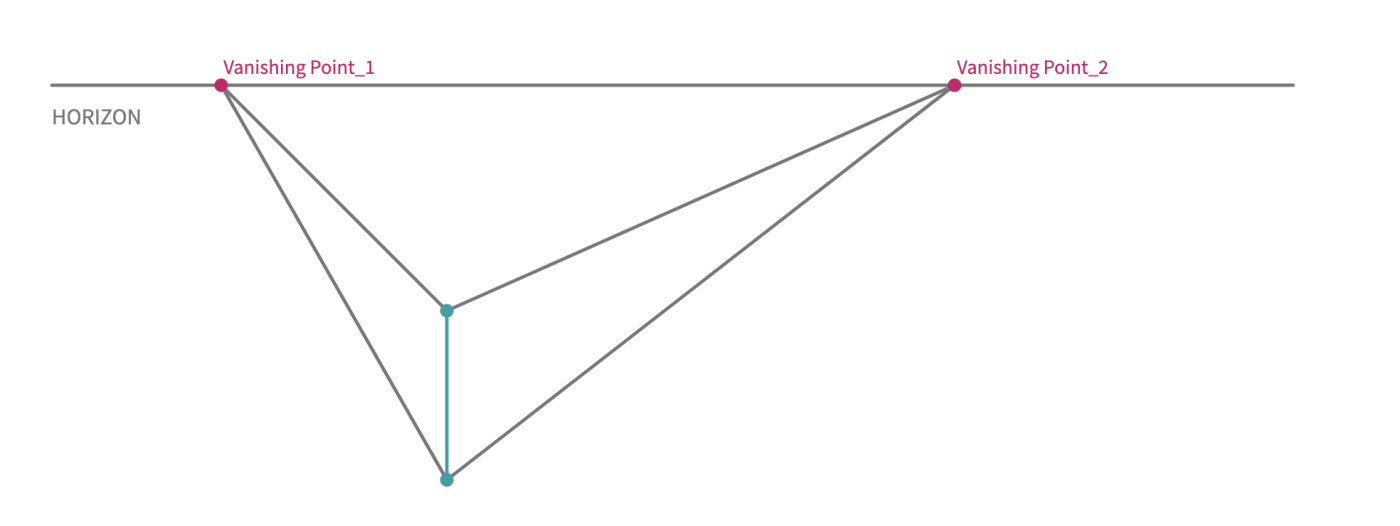
- Insert a point anywhere on one of the orthogonal lines to start drawing the parallel edges of the cube.
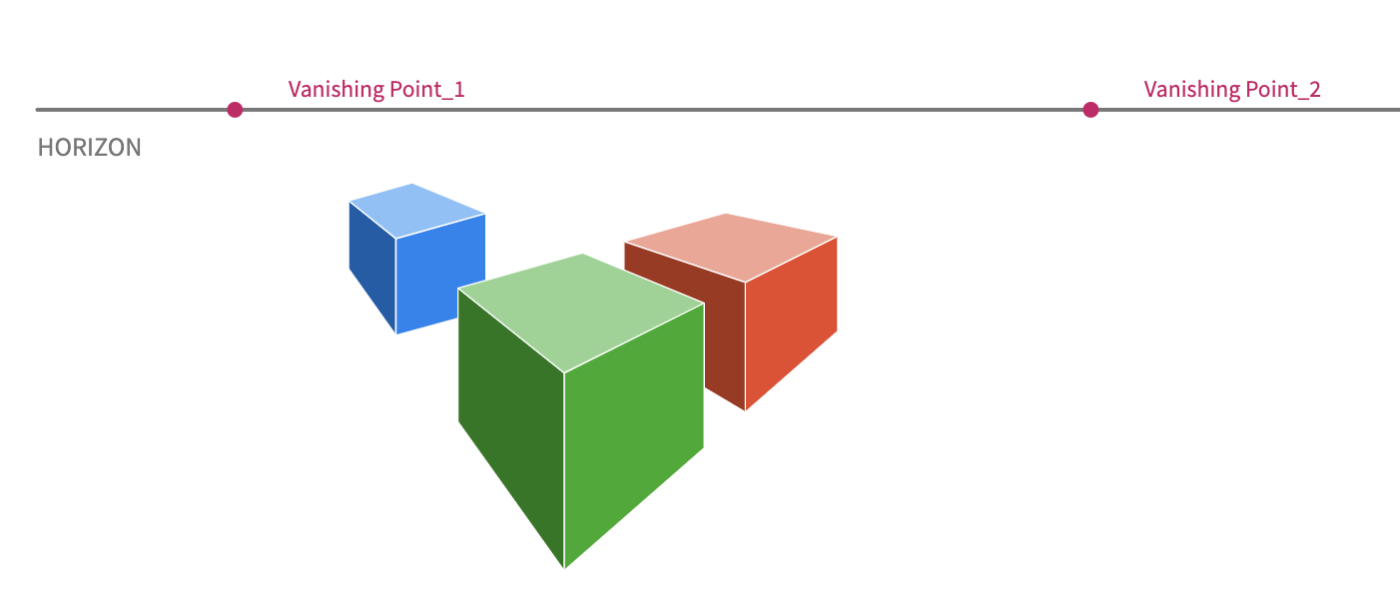
Again, students can continue to create more forms and structıres by repeating the process without changing the vanishing points.
You may use the demonstration Polypad again to show the effects of changing the vanishing points on the drawing:
While perspective drawings gives a realistic view and feeling for the 3D form of an object, they do not preserve the shape or the scale of the object since the size of the object diminishes with distance.
Closure
Discuss with the students that while parallel projection techniques use more accurate measurements, the perspective projection shows distant objects as smaller to provide additional realism. You may end the unit by revisiting students’ initial cube drawings and asking them to try to identify the different techniques they may used.
Transferring 3D information onto a 2D plane eventually causes some data loss in any kind of projection. Professionals decide which method to use according to their needs. Some artists and mathematicians use them to create illusions.
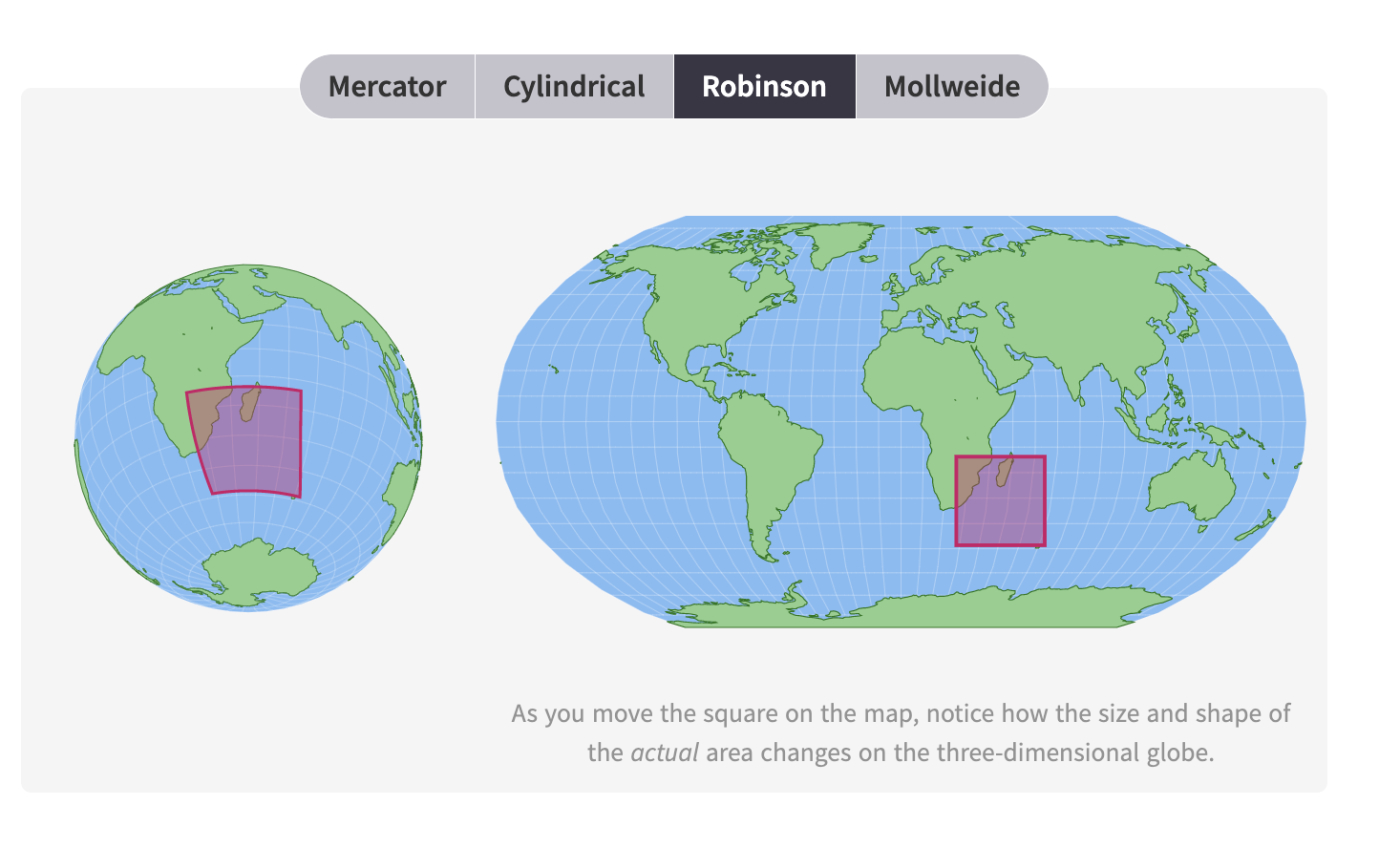
To further explore 3D projections, discuss that Earth is sphere-like 3D shape and all the world maps we see are just the 2D projections of that 3D sphere. As we see, in all kinds of projections, there is always distortion in the drawing. You may recommend students explore Mathigon’s Sphere Maps to learn more about these distortions.
Polypads for This Lesson
To assign these to your classes in Mathigon, save a copy to your Mathigon account. Click here to learn how to share Polypads with students and how to view their work.